Creating a Commerce Experience
The initial commerce experience setup is a great platform for you to build and customize your store to your customer’s needs. Need to set up a selling tree that you want to make active for Black Friday? Everything is easy once you’ve done your initial selling tree setup.
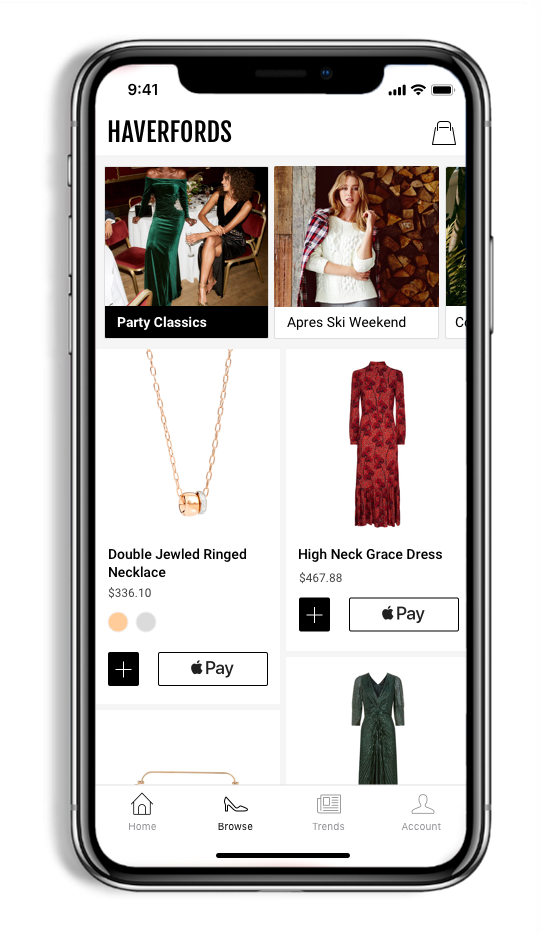
Immersive, visual, dynamic browsing
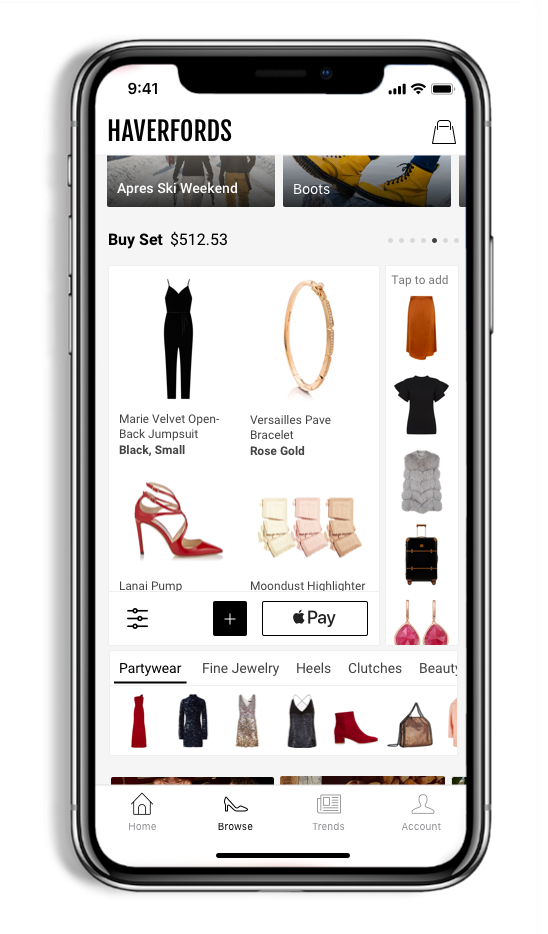
Build your bastket size with AI generated tailed sets
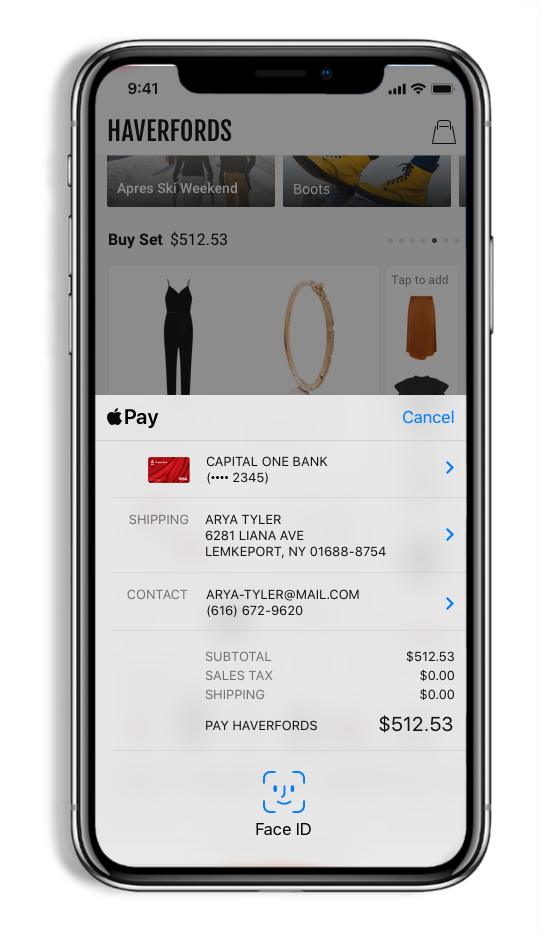
Enable 1-tap buy for frictionless purchasing
Create Edition
An edition is a container that holds a specific set of products. It’s a way for you to display certain products for a period of time. Editions are a way for you to have an institutional memory of what you previously created, which allows you to decrease your time and efforts as you go from one edition to the next. For example, Summer 2019 edition to Summer 2020, to Summer 2021.
- Click Editions.
- Click +Edition. The Create edition tab slides out.
- Provide an edition name and click Add.
- (Optional) Associate an existing experience and/or selling tree to the new edition.
Create Selling Tree
The selling tree is a set of product-category and category-category relationships that are assigned to a browse component.The selling tree lets you select/choose from the products in your inventory and associate them to the created/imported categories. This selling tree is then used with an edition and experience to provide your customers with a defined product list for a specific period of time. Selling trees makes it easier for you to transition your products as you go from season to season or edition to edition. Once you’ve created an initial selling tree, you can use it as a base to add and remove products for your next selling tree. Transitions from the summer to winter edition or from Summer 2019 to Summer 2020 edition are completed with ease.
Create the selling tree.
- In the Upscale Commerce Workbench, click the Editions menu and select Selling Trees in the Object dropdown. The selling tree list displays.
- Click + Selling Tree. The Create selling tree panel slides out.
- Enter a name and description for the selling tree and click Create.
Assign categories and products to the newly created selling tree
- Click the Editions menu.
- Select Categories in the Object dropdown. A list of all the categories displays.
- Select/enable the categories you want to add to your selling tree. The selected categories appear in the action cart.
- From the dropdown list, select Assign to selling tree and click Assign. The Assignment to Selling Tree window displays.
- Determine the following settings for the selected category:
- The selling tree you want to assign the category to and parent category if you want to determine the selling tree category hierarchy.
- Whether to associate the subcategories that belong to this category.
- Whether to associate the products that belong to this category or its subcategories (if applicable). Click save.
NOTE: The categories (and products) are now assigned to the selling tree.
Create Experience
The experience houses the templates that determines the look and feel of your application. You can customize your templates by using the provided components to create your unique experience. The Upscale Commerce Workbench comes with a couple of Starter Stores packages that have configured templates, which allows you to get your store up and running quickly so you can start adding your content. If the Starter Store package doesn’t suit your needs, you can also pick and choose your own templates.
Create templates
- In the Upscale Commerce Workbench, click the Experiences menu to display the experiences page.
- Click the New Experience button for the Create Experience tab to slide out.
- Provide an experience name and a brief description and click Save. You can see your new experience has been added to the list on the experiences page.
- Click on your new experience to open the configuration page and add templates to establish the look and feel of your store.
- Click the Add template button. Select one of the following:
- Commerce - Provides you with all of the necessary templates needed to create a commerce store. Generally, this is all you need to get your store started.
- In-store - Provides you with all of the templates needed to create a kiosk for your physical store.
- Select the templates you need from the provided list. These templates need to be populated with components before any content can be displayed.
TIP: Choosing the Commerce and In-Store package provides you with the templates for your native/PWA and email experience.
Create templates
- Click on the Navigation menu and click the Add navigation group button. Select a navigation group from the dropdown and click Save.
- Click the Navigation item + button to have the Navigation Item tab slide out.
- Complete the following:
- Enter a Display Name.
- Select a Link Type.
- Select a Browse Template.
- Add an Icon.
- (optional) Select the General menu to determine the text for the most common verbiage that is used in your store:
- Add to cart - Text to add an item to the cart.
- 1-Tap flow - Text that allows the customer to purchase a product with one click.
- Filtering - Text that lets the customer filter the products they are browsing.
- Click Save to finalize all of the configurations.
Once you’ve created multiple navigation items, you can arrange the order of the items which determines the order the items appear in the app.
Associating a Selling Tree and Experience to an Edition
After you have created your edition, experience, and selling tree, you need to associate all three objects together to create a single entity which determines how the content is to be displayed and available for your customers for a period of time.
Create the association.
- In the Upscale Commerce Workbench, click the Editions menu.
- Click the edition you want to associate. The Edit edition panel slides out.
- Click the Add association + button.
- Select an experience and selling tree from the corresponding dropdown and click Save.
TIP: An edition and experience association is unique and can only be associated once.
Your selling tree and experience are now associated to the edition.
Assign all of the products in the selling tree to the edition.
- Click the Editions menu and select the name of your selling tree in the View dropdown and Products in the Object dropdown.
- Click Add All (which selects all of the products on the page) and then Select all, to add all the selling tree products to the action cart.
- Select Assign to edition from the dropdown and select the edition in the field below, then click Assign.
All of your selling tree products are now assigned to the edition to ensure that they appear in your app.
Schedule Edition
Once you’ve created your content and made the necessary associations between the edition, experience, and selling tree, you need to schedule when you want your edition to go live and you need to ensure the experience is associated to the application build so your PWA or native app displays the content you have created.
Link the experience to the application build.
- In the Configuration menu, click Applications. The Application configurations page displays.
- Click the application you want your experience to appear in. The selected application’s configuration page displays.
- Select your experience in the Link experience dropdown and click Save.
Your experience is now associated to the correct application build.
Schedule the edition to go live.
- Click the Editions menu. Select Editions from the Object dropdown to display the list of editions.
- Select the edition to add it to the action cart and click Schedule.
- Choose the date and time you want your edition to go live and click Schedule. The edition will be live once the date and time you’ve set is reached.