Create custom PWA styling extension
Using PWA style extensions allows you to customize the look and feel of your experience even further than using experience styles alone. You may apply multiple extensions to a PWA and reuse extensions, which are all easily maintained in your git repository.
It is also possible to use a PWA style extension in conjunction with the "custom component," allowing you to develop custom footers, about me, contact pages, etc. By using a PWA style extension with custom components, you do not have to inline your styles. The styling all comes from your PWA style extension.
Setup
1Name your project folder. Name can be anything.
2Inside your project folder, create a package.json file.
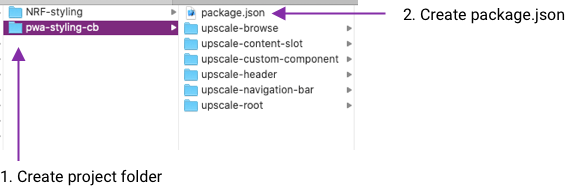
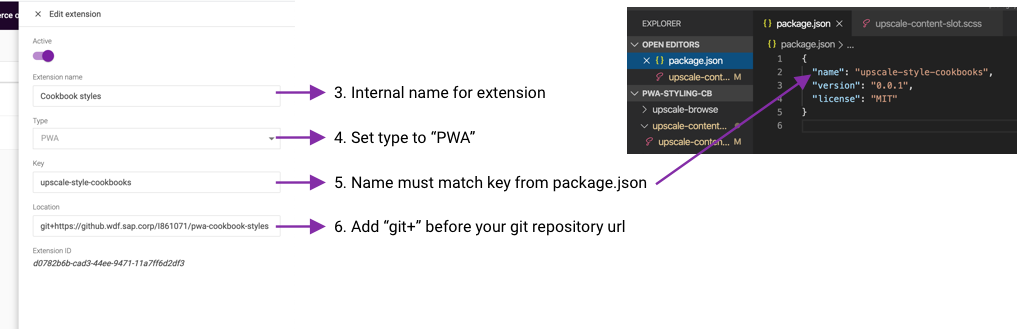
3In package.json, add a name (starting with upscale-style- and version.

Adding style overrides to project
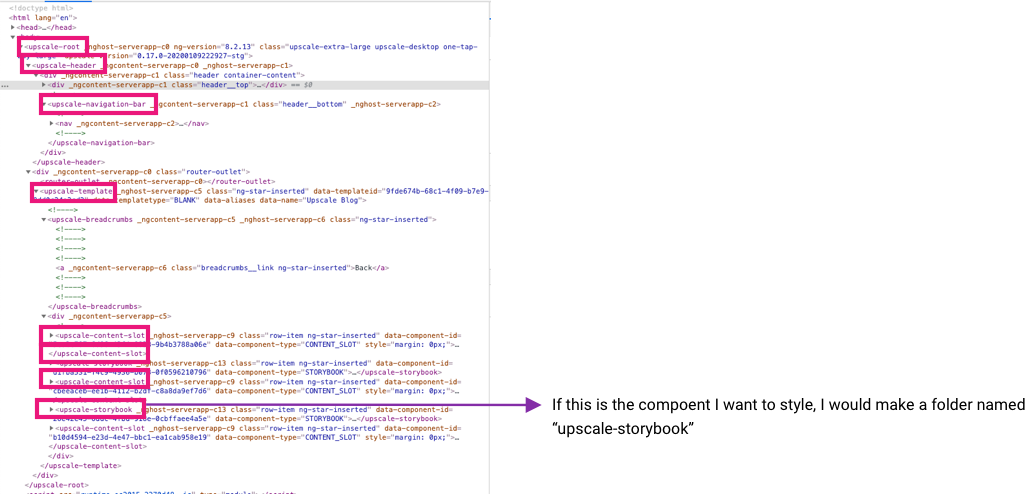
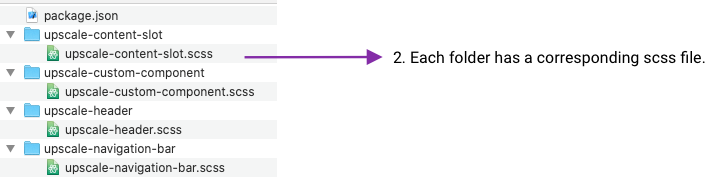
1For each component to style, add a folder to your project. These folders should be at the same level as your package.json file.

TIP You can tell which component you need by inspecting the element you’re overriding. Look for elements that have the format
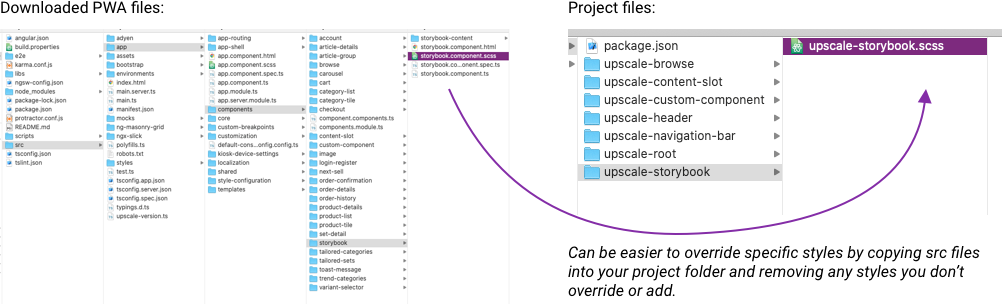
TIP You can see all the components available to style in your downloaded PWA src>app>components.
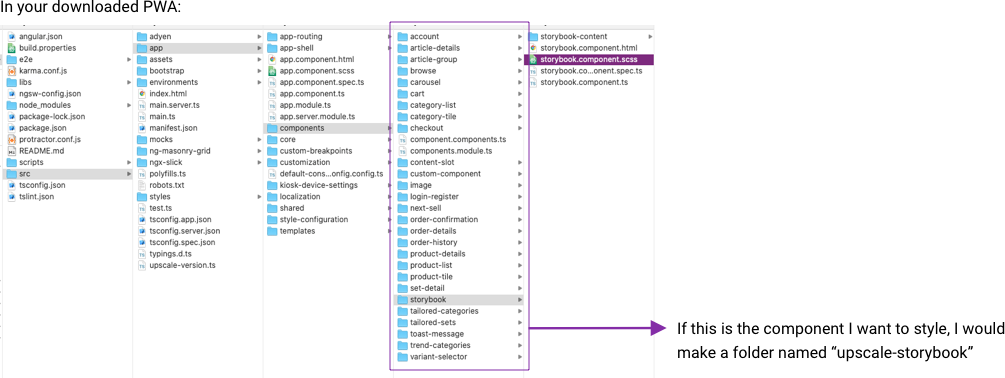
2In your project folder, add a scss file in each folder with the same name as the component.
TIP It is much easier to create styles of the right specificity by copying styles from the corresponding scss file from your downloaded PWA src>app>components. You can delete any styles that you don’t override or add.
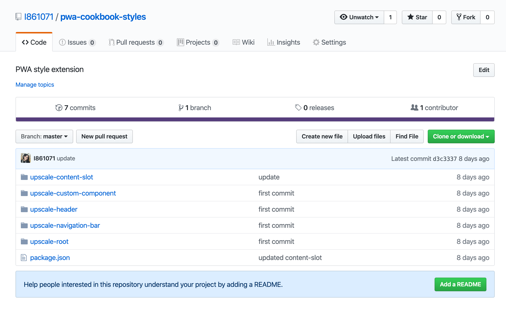
Add your project to a git repository
1Create a git repository and push your project files. Follow the instructions on your new git repository to add the URL for the remote repository and push your commit.
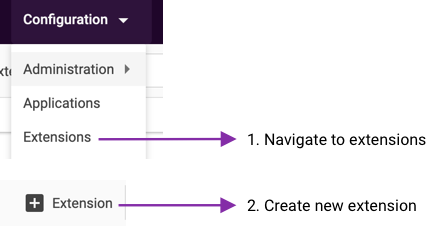
Create an extension in Upscale workbench
1In the workbench, navigate to extensions under the configurations menu.
2Create an extension.
3Name your extension - this is an internal name and can be anything.
4Set the extension type to PWA for a PWA styling extension.
5Copy the name from your package.json file into the key field. These must match.
6In the location field, enter git+ and then paste your git repository URL.
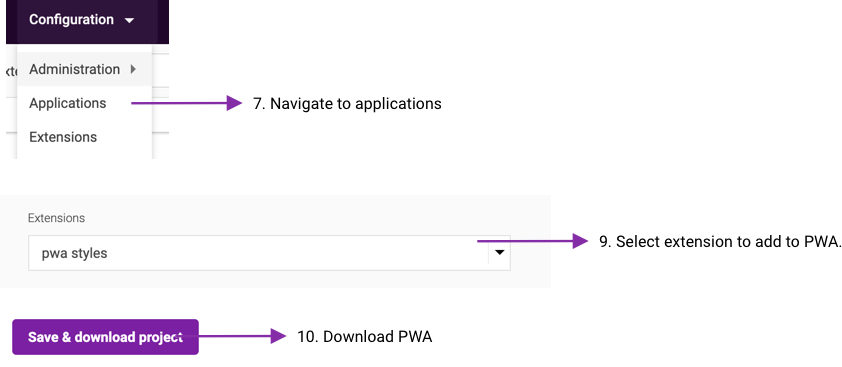
7Navigate to Applications under the configuration menu.
8Select a PWA from the application build list to add the styling extension.
9In the extensions dropdown (under Application links and properties), select your extension to add.
10Download the PWA.
Build and refine
1Unzip your PWA. In the terminal run the command npm install NOT npm ci on the PWA folder.
2Run ‘npm start’ to run PWA locally.
3Check your components to make sure your style overrides worked. If your styles need refining, there a few ways you can refine.
Refine strategy 1) Edit styles while running locally to see styles update immediately.
Refine strategy 2) Update styles from git on a downloaded PWA.
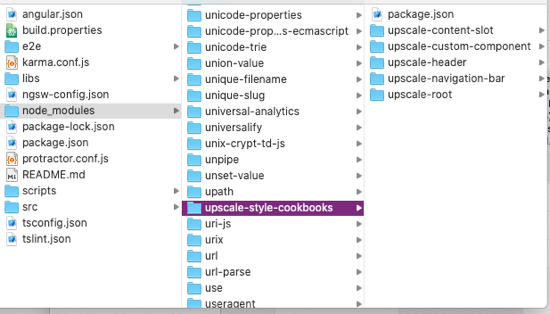
1After pushing changes to your git repository, remove the "upscale-style-" folder from the node_modules folder, and run npm install. When you start your project, you should see your git changes applied.
Use your PWA styling extension with "content slot" Upscale component
1In your PWA style extension project, add an upscale-content-slot folder with an upscale-content-slot.scss file with any styles you want to be applied in your content slot.

2Push your changes to git, and you've cleared your "upscale-style-" folder from the node_module directory and run npm install.
3In the Upscale Workbench under Experience. Add a content slot to a template in any experience using your PWA style extension.
4In the content slot component settings under the overrides tab, there is a limited set of style overrides you can apply without your PWA style extension.

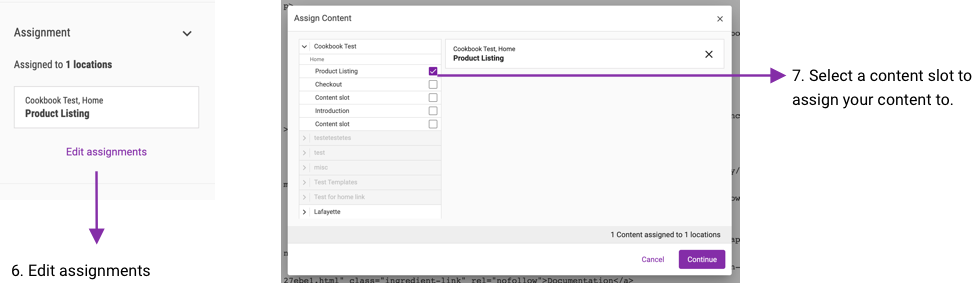
5In the Editions menu, select content and create new content.

6Enter raw HTML using class names from your PWA styling extension. You may also inline your styles.
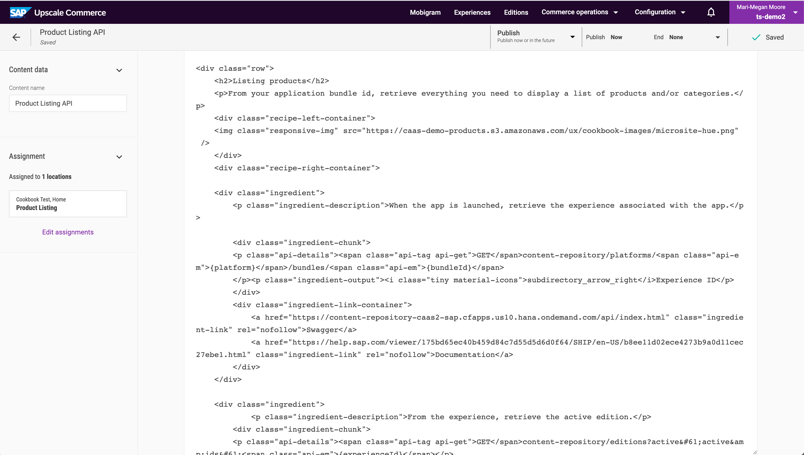
7Edit assignments in the left column, then select a content slot to assign your content.